Mailchimp and AffilBox

Mailchimp is a clever email communication tool – it can send bulk email messages, autoresponders, forms to collect contacts for your website, segment your contacts and many other useful things.
In AffilBox, it serves your connections by automatically enrolling every newly registered partner into your list in Mailchimp. Prepare a welcome series of educational emails for your partners! If you want to send them anything later on, such as news on the program, it will be very easy and efficient.
Chapters
Create a subdomain first
Before deploying codes, create a subdomain for your commission program.
This will give you both a tracking and conversion code in the shape of your domain, and you will have a higher order tracking success rate.
Close MC plugin
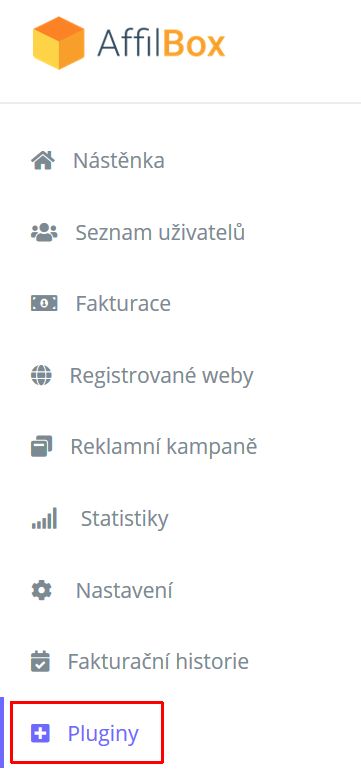
In your AffilBox license, find Plugins in the left menu.
Here you can find the Mailchimp plugin. Simply activate it – it’s free!
Fill in your details
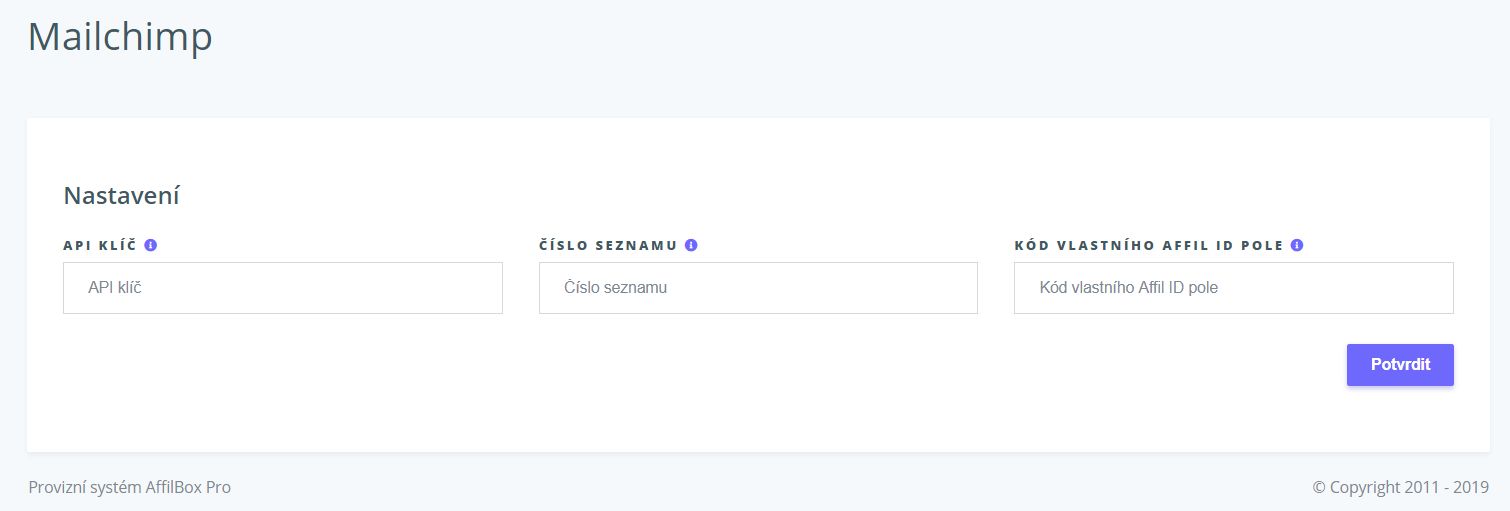
Once activated, open the plugin. There are now three fields waiting to be filled in.
Sign up for Mailchimp
You’ll find the information you need in your Mailchimp.
Log in and and click on your account name in the top right – a menu will appear from which you can select Profile. When the page loads, then select Extras – see image. Within this menu, then click on Api keys.
Here you will find your unique key. Copy it into the AffilBox – under API key.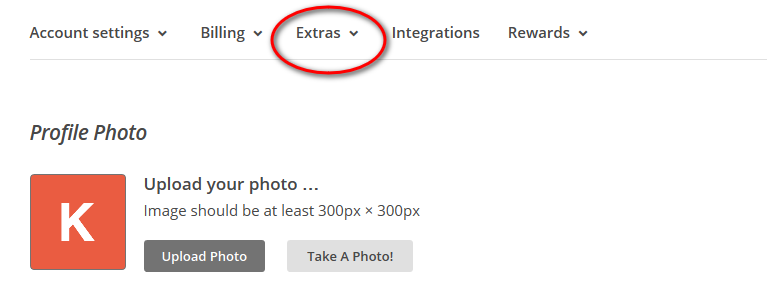

Now we have to find out the list ID. Click on the Lists tab – or your contact lists.
Create a contact list
Here, create a new (List) list. In the overview of your lists, to the right of your newly created list, click the downward pointing arrow and find Settings. Then select List name and Defaults.
Right at the top right you will find the List ID – the number of your list – see image. Copy it and paste it into the second box in AffilBox.

Affiliate ID code
Now we have one last piece of information – the custom affil code. ID field.
The custom field allows you to automatically add a link to your email that is direct to your affiliates – they can immediately start using it for promotion.
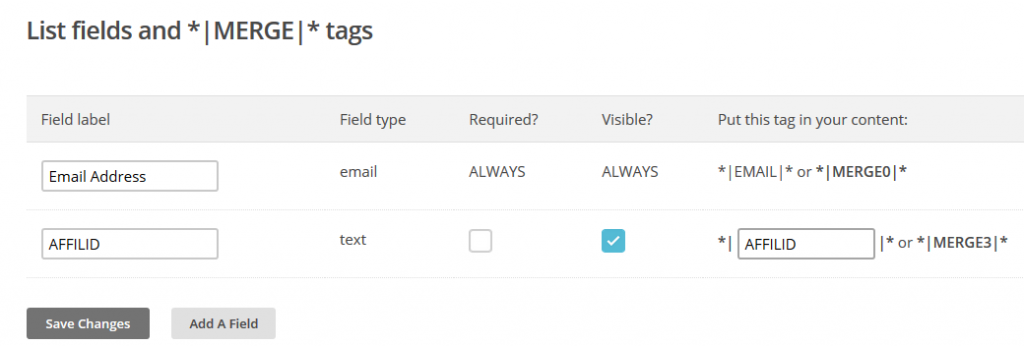
Here’s how to do it: for your list (List), click on the Settings menu and select List fields and Merge Tags – or List Fields and Nested Tags. At the very bottom here, select Add a field – add a field. 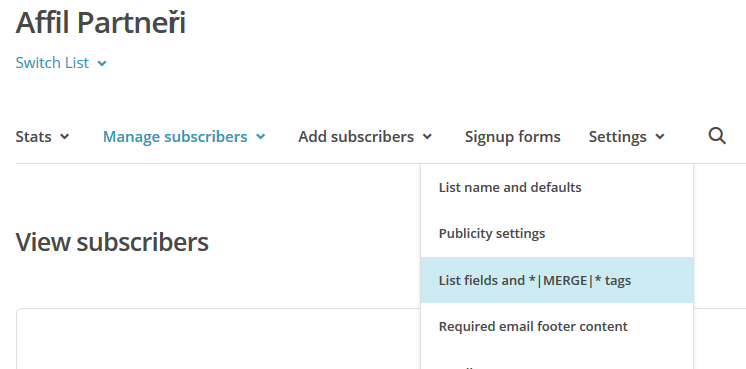
When prompted to Select a field…, select Text. Specify AFFILID as the field name. Save. At the same time, type AFFILID in the third and final field in the AffilBox.
Save and you’re done
You can test everything by adding a new user in the User List.
A final note – a new user will only be automatically added after registering via the login page. Unfortunately, manually adding in the User List does not serve this purpose.



Leave a comment
Your email address will not be published. Required information is marked with *