Implementing AffilBox into Shopify

Shopify is a well-known platform where you can create your own e-shop.
If you want to deploy AffilBox on Shopify, follow our instructions – we will be happy to help you connect it, don’t be afraid to get in touch!
Chapters
Create a subdomain of the aff. interface
Before deploying the codes, create a subdomain for your commission program.
This will allow you to have both tracking and conversion code in the form of your domain, and you will have a higher order tracking success rate.
1. Insert tracking code
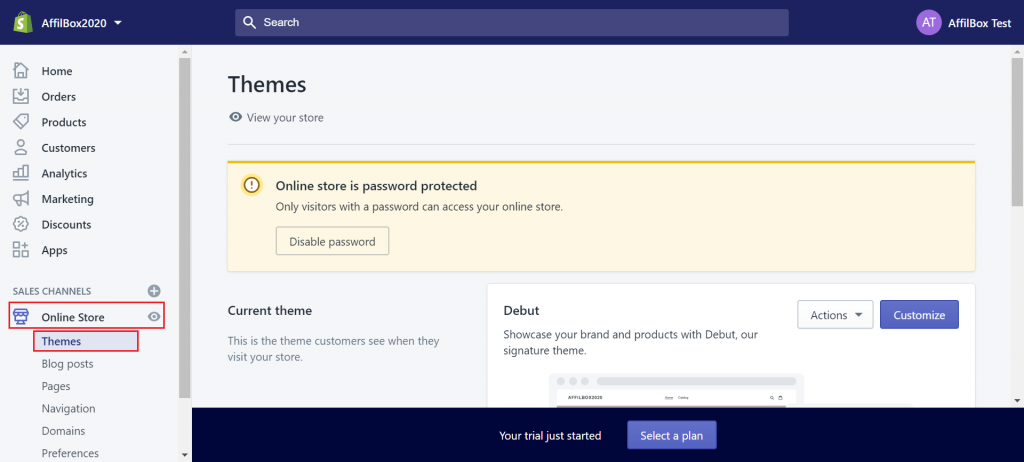
In the Shopify admin, click on the Online store tab in the left menu and select the Theme sub-tab.
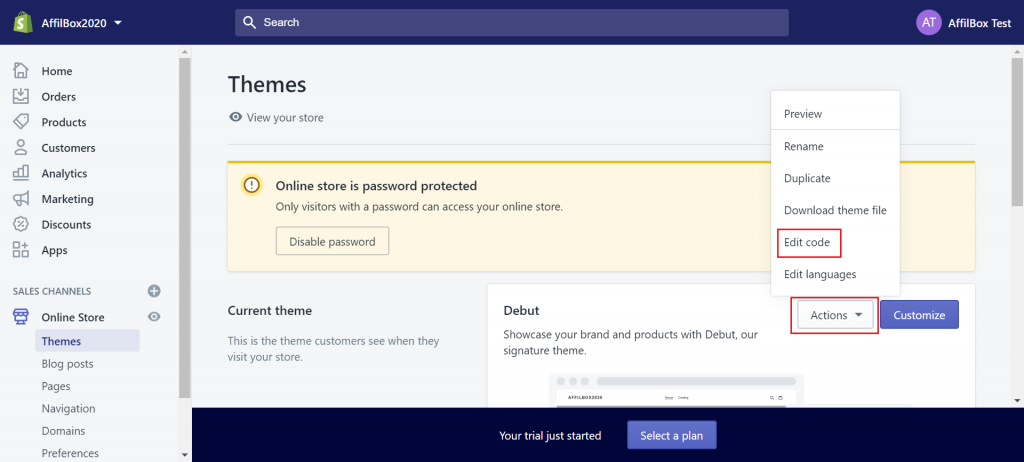
Now on the right, click Actions – Edit code.
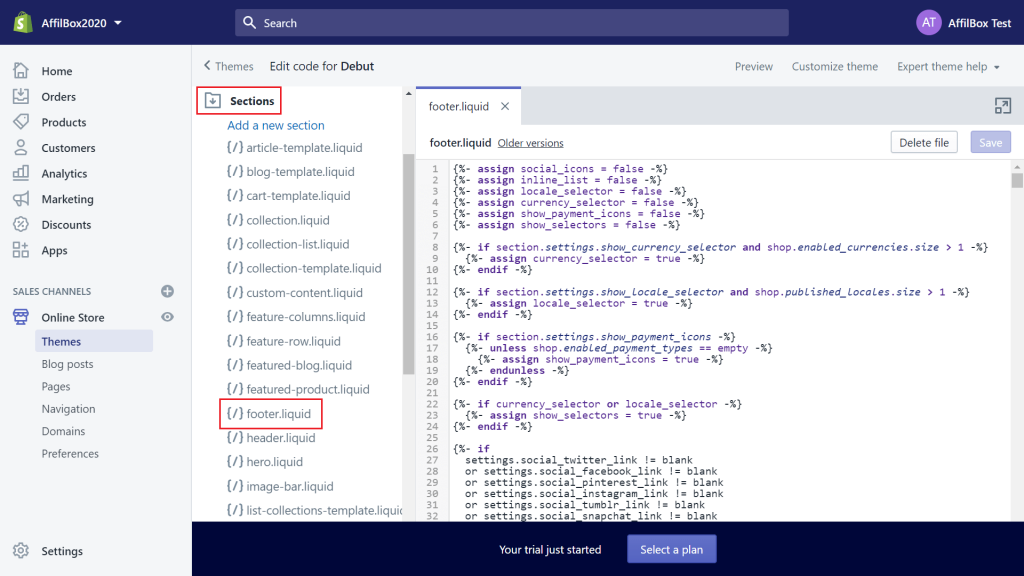
In the left menu, find Sections and then the footer.liquid item, and insert the tracking code from AffilBox here (you can find it with your advertising campaign), ideally before the </footer> exit tag.
save the changes and you have the tracking code embedded.
2. Insert conversion code
.
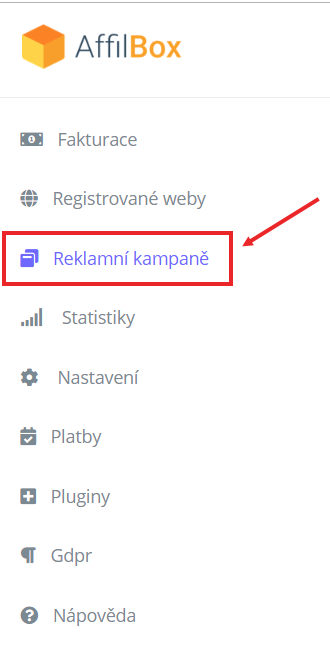
In your Affilbox, click Advertising Campaigns in the left menu.
For a given campaign, click on the Codes tab.
Edit the code to this form:
<script type="text/javascript">
var ab_instance = "xxx.xxxxx.cz";
var ab_kampan = XXX;
var ab_cena = {{ order.subtotal_price | divided_by: 100 }};
var ab_id_transakce = "{{ order.order_number }}";
</script> <script src="https://xxx.xxxxx.cz/c3.js" type="text/javascript" async defer></script>
Replace the letters XXX with the correct digits that AffilBox generated for you.
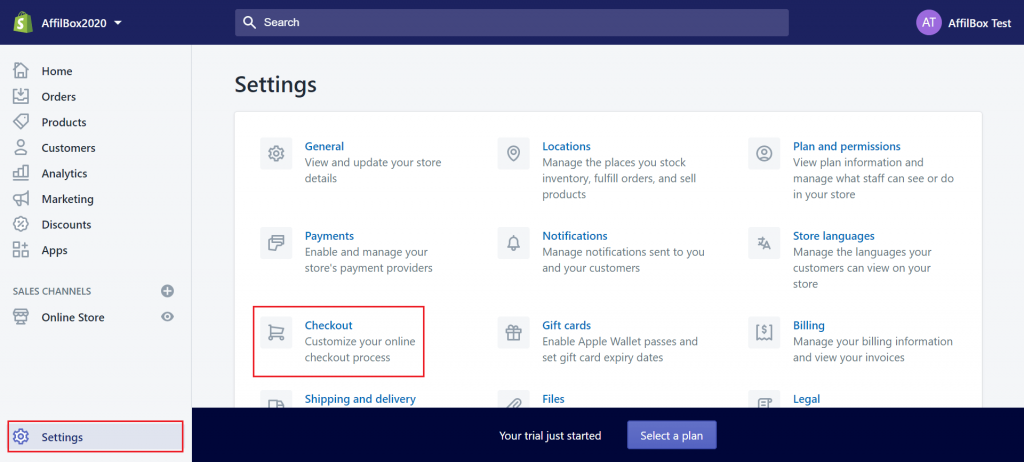
In the Shopify admin, click on the left menu again and select the Settings tab. From the menu, now click through to Checkout.
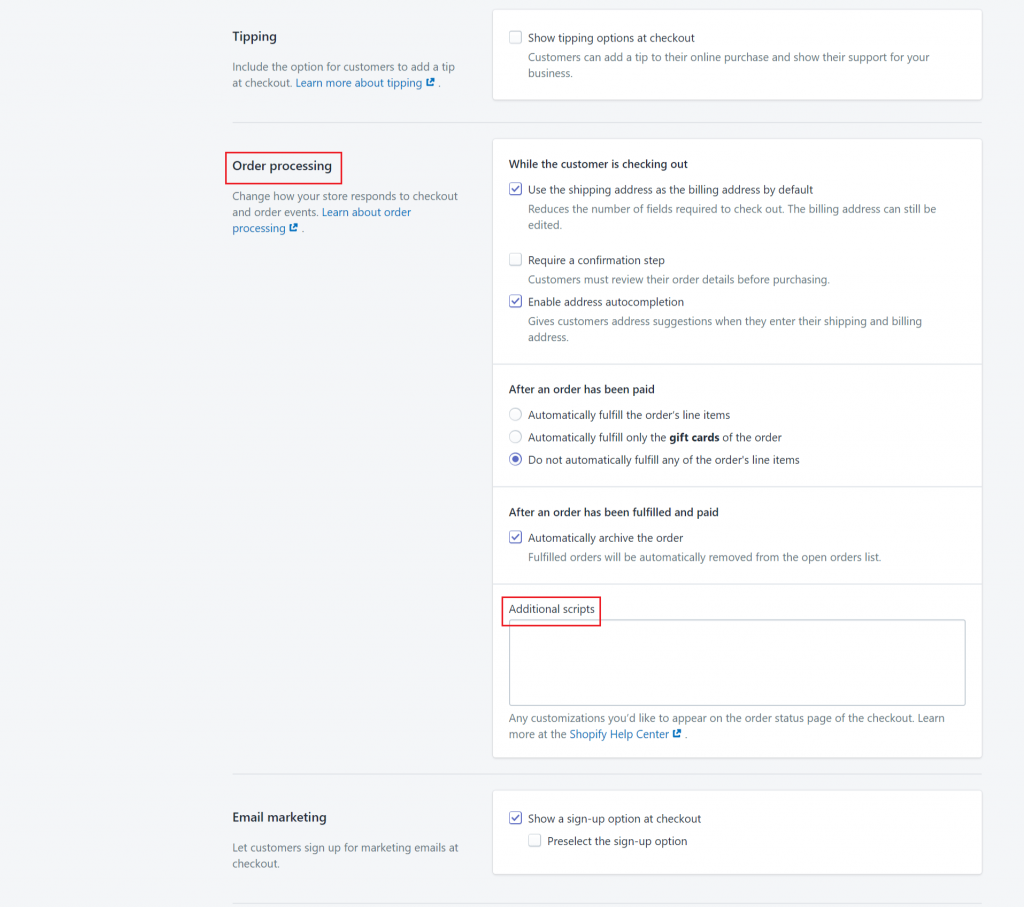
At the bottom, select the Order processing paragraph and then the Additional scripts box.
In this box, enter your conversion code from AffilBox (you can find it under advertising campaigns).
Don’t forget to save everything.
If you don’t know what to do, don’t worry and email us, we’ll be happy to help!


Leave a comment
Your email address will not be published. Required information is marked with *